If you’ve ever dealt with an engine overheating unexpectedly, or noticed inconsistent oil pressure in heavy machinery, industrial generators, or even performance vehicles, you might have heard the phrase “air locking” when it comes to oil coolers. As someone who’s been supplying oil cooler pipes for over a decade, I get it—air in the lines isn’t just a minor annoyance; it can mess up everything from engine efficiency to long-term part durability. Today, I’m walking you through how to bleed air from an oil cooler pipe, and yeah, I’m keeping this real—no fancy jargon, no step-by-step manuals that make you want to zone out. I’ve seen this go wrong hundreds of times, so I’ll tell you what actually works, and what to skip. Oil Cooler Pipe
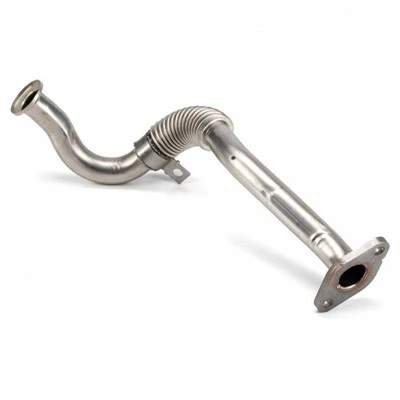
First, let’s cut to the chase: why does air get stuck in oil cooler pipes in the first place? When you install a new oil cooler pipe (or even replace a gasket on an existing one), it’s super easy to trap air inside the line. If you ever tighten a fitting before priming it, or the pipe runs slightly uphill from the oil pump to the cooler, air will settle right there. That air acts like a bubble, blocking oil flow. Oil is the lifeblood of whatever it’s feeding—whether that’s a semi-truck engine, a construction crane’s hydraulic system, or a race car’s motor. Air in the mix means less oil gets to the cooler to dissipate heat, leading to overheating. Worse, those bubbles can cause inconsistent pressure readings, which might make a mechanic think a pump is failing when it’s just a little air.
As a supplier, I always tell customers to check for air right after installing our pipes, not months later when the machine’s acting up. But even if you didn’t just do an install, if your system’s been idling a lot or sitting for a while, air can creep in too. It’s not just new pipes—old ones can develop tiny leaks, pulling air into the line over time. So let’s get to the actual bleeding process. I’m going to break this down for most common setups, but keep in mind: always double-check your machine’s manual first, because some heavy equipment or high-performance engines have their own specific steps.
First, gather your tools. You don’t need a fancy toolbox here. Most of the time, you’ll need: a set of wrenches (your standard metric or standard, depending on your rig), a small container (like a quart oil jug or a metal pan) to catch any spilled oil, a clean rag, and if your oil cooler pipe has a bleeder valve (not all do, but a lot of industrial setups and performance ones do), that’s easy to spot—it’s a tiny, usually brass, screw on the highest point of the line or the cooler itself. If there’s no bleeder valve, don’t panic—we’ve got a workaround for that.
Wait, before you start: safety first. Shut off the engine and let it cool down completely. Hot oil can burn bad, and you don’t want to be fighting with fittings when the engine’s still warm. Prop the hood (or the equipment’s cover) open, and make sure no kids or pets are messing around while you work. Also, make sure you’ve got the right type of oil for your machine—you might need to top it off a little as we go, so have that handy.
Step 1: Locate the highest point in the oil cooler pipe system. This is key because air rises, so that’s where it’s trapped. On most setups, that’s either near the oil filter housing, the inlet of the oil cooler, or a spot where the pipe curves upward between the pump and the cooler. If you can’t find it right away, follow the pipe from the oil pump all the way to the cooler—look for any “peak” in the line. For example, on a lot of pickup truck engines, the oil cooler pipe runs from the side of the engine, up over the transmission, and into the cooler in the front of the radiator. The highest point is that little curve over the transmission. If your pipe doesn’t have a bleeder valve there, that’s the spot we’ll work with next.
Step 2: If you have a bleeder valve, start here. Take your wrench, and attach it to the bleeder valve. Screw it out just a quarter to a half turn—don’t unscrew it all the way, or you’ll be spraying oil all over the place. Now, start the engine and let it idle. You’ll see a mix of oil and air start to come out of the bleeder. At first, it’ll be foamy and sputter— that’s the air escaping. Keep it idling until the fluid coming out is steady, clear (or your normal oil color), no bubbles, no sputtering. That usually takes 30 seconds to a minute. Once that happens, tighten the bleeder valve back up snug—don’t overdo it, you just want a good seal so air doesn’t get in later.
If you don’t have a bleeder valve, don’t stress. I see this all the time with older industrial machinery and some passenger vehicles. The trick here is to manually prime the line to push air out. First, locate the two ends of the oil cooler pipe: one goes to the oil pump outlet, the other goes to the cooler inlet. For the pipe that connects to the oil pump, loosen the fitting on that end just enough so oil can flow out, but not so much that the pipe falls off. Leave the other end connected for now. Now, have someone (or if you’re working alone, you can use a clean funnel) pour a small amount of oil into the end of the pipe that connects to the cooler. You’ll see the oil push any air out the loose pump fitting. Keep adding oil until the stream coming out is solid, no bubbles. Then, tighten the pump fitting back up, top off your oil reservoir to the correct level, and you’re done. This method works because you’re literally filling the pipe with oil before the engine even starts, so there’s no air trapped when you fire it up.
Wait, a couple of pro tips from someone who’s replaced hundreds of oil cooler pipes: don’t skip priming, even if you think you didn’t trap any air. Last year, a customer bought two of our heavy-duty pipes for their dump truck, skipped bleeding, and two weeks later the truck was overheating at a construction site. They ended up paying for a tow and a mechanic, when if they’d spent 2 minutes bleeding, they would’ve been fine. Another thing: if your oil cooler pipe runs more than a few feet, you might have multiple air pockets. For example, if there’s a curve at the pump, a curve at the cooler, and a midpoint, check all those spots. Sometimes air gets stuck in a lower curve too—don’t just go for the highest point. I once had a race team come to me because their car was losing power, and it turned out air was trapped in a dip in their pipe that they’d missed. That’s why checking every peak and curve is important.
Also, let’s talk about when air in the pipe is a sign of a bigger problem. If you bleed the air, and a week later your system is sputtering again, that means you’ve got a leak somewhere. Check the fittings on your oil cooler pipe—gaskets can wear out, threads can strip, or a crack in the pipe itself can pull air in. As a supplier, we use heavy-duty materials for our pipes (stainless steel for high-performance, high-density rubber for industrial) so leaks are rare, but they do happen over time if the equipment’s been in tough conditions—like construction sites where there’s a lot of vibration, or cold climates where rubber hardens. If that’s the case, a new oil cooler pipe from us will fix the leak, and you won’t have to deal with air locking again.
Now, let’s wrap this up with a quick recap, so you don’t forget: 1. Let the engine cool down, safety first. 2. Find the highest point (and any curves) in your oil cooler pipe. 3. If there’s a bleeder valve, loosen it, idle the engine until oil flows steady, tighten back up. 4. No bleeder? Loosen one end of the pipe, pour oil into the other end until air is pushed out, tighten back up, top off oil. 5. If air keeps coming back, check for leaks—maybe it’s time for a new oil cooler pipe.
If you’re installing a new oil cooler pipe, or you suspect your current one has a leak that’s causing air locking, we’re here to help. We make oil cooler pipes for everything from light-duty pickup trucks to heavy industrial equipment and high-performance race cars—custom fits, durable materials, and fast shipping to get your machine back up and running. If you have questions about your setup, or want to place an order, reach out to our team. We can walk you through any specific steps for your rig, no matter how big or small.
References
- Society of Automotive Engineers (SAE) International. (2020). Automotive Fluid System Venting and Air Management.
- Hydraulic Institute. (2019). Air Entrainment in Hydraulic Systems: Causes, Effects, and Mitigation.
- Engine Manufacturers Association. (2021). Heavy-Duty Engine Lubrication System Maintenance Guidelines.
- Fisher, T. (2018). Performance Lubrication Systems: Air Management for Racing Engines.
Clutch Hose (Word count: 3127)
Zhejiang Guicheng Machinery Technology Co., Ltd.
As one of the most professional oil cooler pipe manufacturers and suppliers in China, we have world-leading production equipment and strong manufacturing capabilities. Please rest assured to buy durable oil cooler pipe in stock here and get quotation from our factory. For price consultation, contact us.
Address: Room 102, Building 3, Youdi Metal Intelligent Manufacturing Industrial Park, No.11 Huzhong Road, Diankou Town, Zhuji City, Shaoxing, Zhejiang Province
E-mail: guichengjixie@qq.com
WebSite: https://www.guichengjixie.com/
