If you’re someone who works in manufacturing, construction, or even just DIY projects that require precision hardware, you’ve probably wasted time and money on the wrong socket head cap screws. I’ve been supplying these fasteners for over 12 years, and let me tell you—most people I talk to skip the measuring part entirely, or they do it wrong, and that’s where all the headaches start. A friend of mine runs a small machine shop, and last year he ordered 500 M6 screws thinking they were standard, only to find the head was too big for his tooling. He had to send ’em back, and that delayed his order by a full week. That’s why today I’m breaking down exactly how to measure socket head cap screws the right way—no fancy tools required, just a few basics and the know-how I’ve picked up over thousands of orders. Socket Head Cap Screws
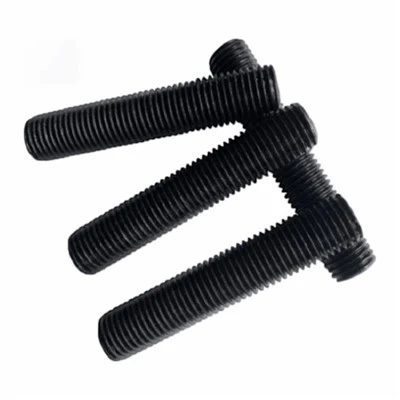
First off, let’s get the basics straight: what even is a socket head cap screw? For anyone new, it’s that cylindrical screw with a hollow hex socket on top—you use an Allen key (or hex drive, if you wanna get technical) to turn it. They’re super popular because they sit flush when tightened, which saves space, and they have higher torque capacity than, say, Phillips-head screws. But here’s the thing: their specs aren’t just about the length people usually care about. There are three main measurements you need to nail every time: thread size, length, and head dimensions. Mess any of those up, and the screw’s useless for your job.
Let’s start with thread size, because that’s the foundation. Thread size for socket head cap screws uses two numbers—like M6-1.0 or 1/4-20. Wait, hold on, that’s metric vs. imperial, right? I can’t tell you how many times I’ve had a customer mix those up, thinking M6 is the same as 1/4”. Spoiler: it’s not. M6 is metric, meaning 6mm diameter at the major thread (the widest part of the thread). 1/4” is imperial, so that’s roughly 6.35mm, which is why it’s a little bigger. To measure thread size accurately, grab a digital caliper—they’re like $15 on Amazon, worth every penny. Avoid a ruler, that’s way too imprecise. Open the caliper jaws and wrap them around the outermost ridges of the thread, not the shaft—go across the top of the threads, not the valleys. For metric screws, that number is your major diameter (like M8 = 8mm). For imperial, it’s a fraction (like 1/4”). The second number is the thread pitch—metric is mm per revolution (M6-1.0 means 1mm between each thread), imperial is threads per inch (1/4-20 means 20 threads per inch). How to check pitch? If you don’t have a pitch gauge, wrap a piece of paper around the thread, mark where the first and last thread align, then unfold it and measure the distance between marks. For imperial, count how many threads are in 1 inch. For metric, measure the space between two threads. If you get this wrong, even a screw that “fits” will strip because it doesn’t engage correctly. I had a customer last month who ordered M5 screws for a custom bracket, but he got M5-0.8 instead of the standard M5-0.5. The holes were tapped for 0.5mm pitch, so the 0.8 ones wouldn’t seat all the way. He thought he’d ordered the same size, but pitch is non-negotiable.
Next up: length. This is where people make the most mistakes, hands down. Most folks just measure from the top of the head to the end of the screw, but that’s not always right. Wait—what? Yeah, it depends on if you’re using a flat head or a socket head, and if there’s a nut or a counterbore. For socket head cap screws specifically, the industry standard is to measure length from the bottom of the head (the part that sits against the surface) to the tip of the screw, not the top of the head. I see this all the time: someone measures from the top of the hex socket, says they need a 20mm screw, and the one we send is actually 20mm from the bottom of the head, so it’s way longer than they need and sticks out. If you’re screwing into a threaded hole (like a metal component), that’s the correct measurement. But if you’re using a nut, you have to account for the nut’s thickness too. Rule of thumb there: add at least 2 threads past the nut’s thickness, so the screw doesn’t bottom out in the nut and lose grip. For example, if your nut is 10mm thick, a 20mm screw would be enough (10mm through the nut, 10mm past, that’s about 2 threads for most pitches). Pro tip: if you’re working with a blind hole (a hole that doesn’t go all the way through the part), never use a screw longer than 75% of the hole’s depth. That leaves room for the tap’s groove, so the screw doesn’t get stuck on metal shavings. My dad taught me that back when he ran a small fabrication shop in the 90s—saved us hundreds of screws over the years from getting seized in holes.
Then there’s the head dimensions. This is the unsung part that most people overlook, but it’s make-or-break for fitting your tooling. The two key measurements here are head diameter and head height (sometimes called head thickness). The head diameter is how wide the hex part is across the flats—so if you’re using an Allen key, the key has to fit perfectly in the socket. For example, an M6 socket head cap screw usually has a 4mm hex socket, so you need a 4mm Allen key. If the socket is worn out from a different screw, or if the head is slightly too big, your Allen key will slip, strip the socket, and ruin the screw (and probably your day). Head height is how tall the head is from the bottom to the top of the hex—super important if you have a counterbore hole, which is a recess that lets the screw sit flush with the surface. If the head is taller than the counterbore depth, the screw sticks up, which is a hazard in assembly or ruins the look of a finished product. For example, a common M8 x 20 screw has a head height of about 6mm, so your counterbore needs to be at least 6mm deep. If you don’t have a counterbore, no big deal, but if you’re installing in a tight space where the screw can’t protrude, that head height is non-negotiable. I once had a customer building a piece of custom furniture that needed every screw flush with the tabletop. He ordered M5 screws, measured the length wrong, and ended up with heads that stuck out 1mm—enough to catch a hand. He had to sand every single screw flat, which took him 2 hours. That’s the kind of avoidable hassle we try to help folks skip.
Wait, let’s talk about tools, because you don’t need a fancy lab to measure these. A digital caliper is the best bet—cost-effective, precise, and works for both metric and imperial. A vernier caliper works too, but digital is way easier for quick checks. If you don’t have a caliper, a good ruler with mm markings works for rough measurements, but only if you’re extra careful. Avoid a tape measure—those are way too flexible and will give you bad numbers. Also, don’t just guess the thread size by comparing to a screw you already have. That’s a common mistake I get all the time. Someone will say “this M5 screw works, so send me M5s” but the old one is worn down, so its diameter is slightly smaller than standard. Always measure the actual screw you’re using, not a reference. I keep a small thread pitch gauge in my tool box for that exact reason—even a cheap one can save you from ordering the wrong stuff.
Let’s go through a real example to make this concrete. Say you’re building a wooden shelf that connects two 2x4s. You need a screw that goes through the top 2×4 (1.5” thick) and threads into the bottom one. First, measure the thread size: take the screw that worked on your test piece, measure the major diameter—say it’s 1/4” (imperial) or 6mm (metric). Now measure length: since you’re threading into a hole, you need to measure from the bottom of the head to the tip. The top 2×4 is 1.5”, so add a little for engagement with the bottom one—so a 2” (imperial) or 50mm (metric) screw would work. Now check head height: if your shelf needs the screw to sit just below the wood surface, make sure the head height is less than the counterbore you drill (usually 1/8” less than the wood thickness). If you mix up imperial and metric here, you’d order a 50mm screw which is almost 2”, way too long, and would stick out the back of the shelf. That’s the exact mistake I mentioned earlier with my shop friend.
A few bonus tips that I’ve learned the hard way over the years: first, check for thread fit before installing. Grab a nut or a tapped hole, test the screw—if it takes more than two turns to start, or it feels cross-threaded, that’s the wrong size. Don’t force it, that’s how you strip threads. Second, if you’re ordering in bulk, always ask for a sample first. I recommend this to all my customers, even the big ones—because sometimes production runs have tiny variances, and testing one screw saves you from a bad batch of 10,000. Third, don’t ignore the finish. Wait, is that part of measuring? Sort of—because a screw with a black oxide finish might be slightly thinner than a zinc-plated one, so that can throw off your diameter measurement if you’re using a caliper that measures to the thousandth of an inch. Not a big deal for most jobs, but if you’re doing precision work like aerospace or medical parts, that’s something to note.
Now, why does this matter so much for suppliers like me? Because I know how frustrating it is when a customer gets the wrong screw and has to redo work. That’s why I make sure all our screws are clearly labeled with both metric and imperial specs if applicable, and I include a small caliper guide in every bulk order so folks can double-check. But at the end of the day, the responsibility is on everyone to measure correctly.
If you’re still confused about what size you need, or you’re not sure how to measure a specific socket head cap screw for your project, don’t guess. Reach out—we’re here to help. We work with small DIYers, big manufacturing companies, and everyone in between, so we’ve seen just about every screw measurement question out there. Just tell me what your project is, what parts you’re connecting, and any constraints (like flush fitting, tight spaces, etc.), and we can walk you through the exact size you need. No jargon, no pressure—just honest advice from someone who’s been in this game for over a decade.

Before I wrap up, let me recap the key points so you don’t forget: 1) Thread size = measure the widest part of the thread with a caliper, note metric (M X-X) or imperial (X/X – X), and double-check pitch. 2) Length = measure from the bottom of the head to the tip, adjust for nut thickness or blind hole depth. 3) Head dimensions = check head diameter for your Allen key fit, head height for flush mounting. Skip the guesswork, invest in a $15 caliper, and you’ll save yourself so much time and money.
Fully Threaded Bolts References:
- Machinery’s Handbook, 31st Edition
- ASME B18.3-2021, Socket Head Cap Screws
- International Organization for Standardization (ISO) 4762:2018, Hexagon socket head cap screws
Handan Jihao Fastener Co., Ltd.
We’re known as one of the most professional socket head cap screws manufacturers and suppliers in China. With abundant experience, we warmly welcome you to wholesale customized socket head cap screws made in China here from our factory. If you have any enquiry about cooperation, please feel free to email us.
Address: A2, Row 31, Feiyu Screw World, Hebei Pu, Linmengguan Town, Yongnian District, Handan City, Hebei Province
E-mail: wenzhaona0@gmail.com
WebSite: https://www.chinaboltnut.com/
